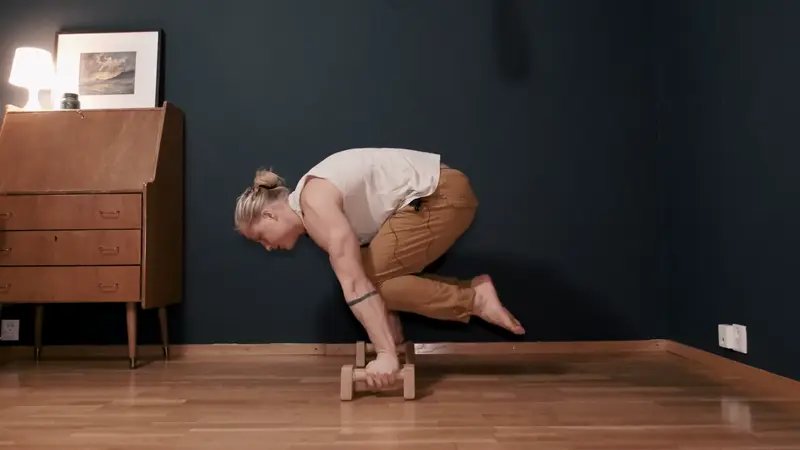
The tuck planche is a deceptively hard skill — it looks easy, but it isn't. It's your first real milestone on the road to a full planche, though you don't need the full planche as a goal to get value out of it. The straight-arm strength and scapular control you build here carry straight over to handstand work like the handstand push-up, press-to-handstand, and the straddle planche press, and having a solid tuck planche in your pocket opens the door to a lot of fun transitions and combos.
Prerequisites
You're ready to start training the tuck planche when you have:
- A comfortable tuck L-sit, so straight-arm support and knee-tuck are already familiar
- Solid pressing strength from pike push-ups
- Mobile, pain-free wrists that can tolerate loaded extension
How to do it
Start crouched on your toes with your hands on the floor, fingers pointing about 45° outward. From the ground up:
- Hands: turn them out about 45° — you still get leverage through your fingers without bending your wrists as hard as a fingers-forward grip would
- Elbows: locked straight; tighten your triceps to help hold the lockout
- Shoulders: protracted (pushed forward) and depressed (pulled down) — tighten your chest to keep them there
- Back: rounded, not arched — this shortens your upper body and shifts your center of gravity closer to your shoulders, and it helps you engage your spinal extensors properly
- Knees: tucked as close to your chest as you can get them — the single biggest thing people get wrong is leaving the knees too far back, which makes the hold much harder
Push hard into the floor through protracted, depressed shoulders, round your back, then lean forward while pulling your knees to your chest until your feet lift off the ground.
Progressions
Work through these in order — each one removes a bit of the balance or strength demand of the last:
- Crow stand — elbows bent, knees resting on top of them, leaning forward until your feet lift. Squeeze your fingers into the floor to control the balance
- Straight-arm crow — same position, but straighten your elbows. Start with your knees low on your arms and work them up toward your elbows as you get stronger; this is most of the way to a tuck planche with less strength needed
- Tuck planche lift-offs — from the full tuck planche setup, lift one foot at a time and lean as far forward as you can to unweight your feet
- Tuck planche negatives — lift into the hold, then lower slowly to a seated position under control, for reps
- Full tuck planche hold — hold the static position once your lift-offs and negatives feel solid
Strength drill: pike planche press
Sit in a pike position, hands on the floor, then lean forward — straightening your hips completely — and press back up to pike. The closer your hands are to your legs, the harder it gets. Track progress with a wall: measure hand distance from the wall in "hands" (or hands-and-fingers for finer jumps), start each rep with your head touching the wall in the leaned-forward position, and press back to pike. Move your hands further from the wall as you improve. Keep the same form cues here as in the hold itself: straight elbows, protracted/depressed shoulders, rounded back.
Learn more here:
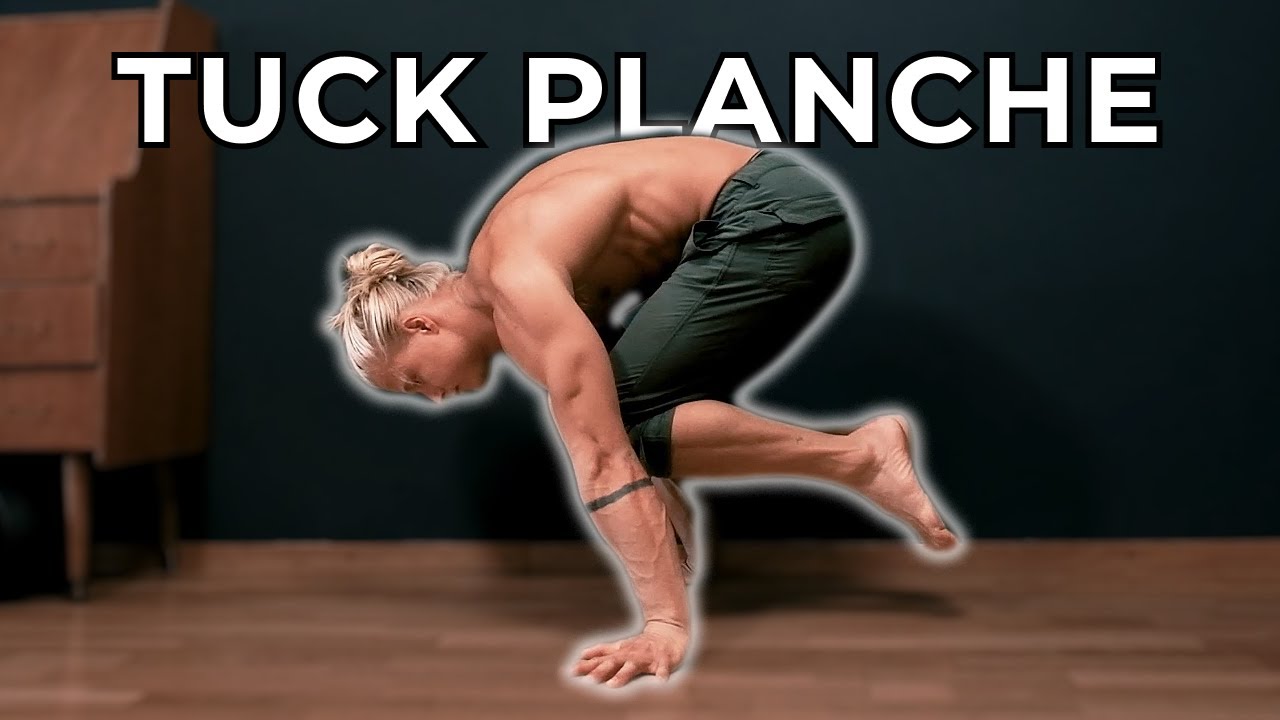
Video by Sondre Berg
Key tips
- Turn your hands out ~45° rather than pointing fingers straight forward — easier on the wrists at the same leverage
- Lock your elbows and tighten your triceps; a bent-elbow planche is a much harder, different skill
- Protract and depress your shoulders, and keep them there with a tight chest
- Tuck your knees as close to your chest as possible; knees drifting back is the most common reason this feels impossible
- Master the straight-arm crow before chasing the full hold — it's the same shape with much less strength required
- Track pike planche press progress by hand-distance from a wall so you can see small weekly gains