AddedThis suggestion was approved on Nov 1, 2026 - the changes below are live.
View live article
Final community vote: 0 yes / 0 no
added
removed
---
title: Reading the trail map
image: reading-the-mountain.jpgreading-the-mountain.mp4
skill: navigate a ski resort using a trail map and understand terrain difficulty
tags:
- fundamentals
prerequisite:
- introduction
- picking-skis-and-boots
- mountain-etiquette
---
A trail map is your guide to a ski resort, showing you all the runs, lifts, and facilities. It helps you navigate the mountain and choose terrain that matches your skill level.
A ski trail map (a piste map in Europe) is a drawing of the whole resort: every run, every lift, and the lodges, toilets and ski patrol huts in between. Learning to read one takes ten minutes and saves you from the classic beginner day - riding a lift to the top, finding only black runs down, and side-stepping for an hour.
Look for trail maps at the base lodge, near chairlifts, or grab a paper copy from the ticket office or rental shop. They're usually oriented so 'up' on the map is 'up' the mountain.
You can pick up a paper map at the ticket office, rental shop or base lodge, and most resorts print it on boards at the top and bottom of every lift. Nearly every resort also has it in an app, which adds a blue dot for where you are. Carry the paper one anyway; phones die in the cold.
Every map uses universal symbols for trail difficulty: green circles for easy, blue squares for intermediate, black diamonds for advanced, and double black diamonds for expert terrain.In Europe the colours differ slightly: green or blue for easy, red for intermediate and black for advanced. ## How the map is drawn
You'll also see symbols for lifts, lodges, and other facilities.
Trail maps are paintings, not maps to scale. The artist flattens the mountain so you see it from the valley, with "up" on the page being "up" the hill. Distances are squashed, runs on the far side of a ridge are bent round to fit, and one map often shows several peaks that are really miles apart.
Use the map to plan your route down the mountain, choosing runs that match your comfort level. So use the map for *connections*, not distances. Pay attention to where lifts take you and how to get back to the base or other areas. The questions it answers well are "which lift gets me to that run", "where does this run end up" and "how do I get back to where I started". It answers "how long will that take" badly.
## What the symbols mean
Every run has a colour and shape, and the colour is a rating of that run *relative to the rest of this resort*, not a universal standard. A blue at a steep resort can be harder than a black at a gentle one.
**North America** uses shapes as well as colours, so they still work in black and white:
- **Green circle** - easiest. Wide, gentle, groomed.
- **Blue square** - intermediate. Steeper, may have rolls and narrower sections.
- **Black diamond** - advanced. Steep, often ungroomed, moguls or trees.
- **Double black diamond** - expert. Very steep, cliffs, chutes, no fall zones.
- **Orange oval** - terrain park. Jumps, rails and boxes.
- A **dashed line** usually means a cat track or a connecting trail - flat, narrow, and not a run you would choose for fun.
**Europe** uses colours only, and the scale is shifted:
- **Green** - very easy (not every country uses it; France and Spain do).
- **Blue** - easy. Roughly a North American green or easy blue.
- **Red** - intermediate. Roughly a North American blue or easy black.
- **Black** - advanced. Anything from a steep groomer to a mogul field.
- **Yellow or dashed** - an itinerary route. Marked and avalanche-controlled but not groomed or patrolled. Not a piste.
Off-piste (anything not on a marked run) is unmarked on both continents and is your own responsibility. Read [off-piste safety](/skiing/off-piste-safety) before you go anywhere near it.
Lifts have their own symbols too - a line with a little chair, gondola, or a short tick for a button lift or T-bar. The lift type matters when you are new: [button lifts and T-bars](/skiing/button-lift-and-t-bar) are harder to ride than a chairlift, and a gondola means you take your skis off.
## Reading the lifts
The lifts are the skeleton of the map. Before you choose a run, trace the lift that takes you to its top and check two things:
1. **What runs leave the top of that lift?** If every one of them is black, that lift is not for you yet, no matter how friendly the run you spotted lower down looks.
2. **Where does the bottom of the run put you?** Ideally at the base of the same lift (a "pod" you can lap all day) or at the base area. If it ends at a different lift, check what *that* lift serves.
A green run that ends at a lift which only serves blacks is a trap worth spotting before you get on it.
A trap worth spotting on the map before you get on anything: a green run that ends at a lift which only serves blacks. The map shows it clearly if you look; the mountain does not.
## Planning a route down
Pick your run from the top, not from the bottom. Start at the lift you are standing at, find its top on the map, and follow a run down with your finger until it reaches somewhere you recognise. Say the run names (or numbers) out loud - at the junctions on the hill you will see signposts with exactly those names, and matching them is how you stay on route.
For your first days: stick to one pod with a green or blue down and a chairlift back up, and lap it. Exploring across the resort is a day-three activity, once [your first blue run](/skiing/your-first-blue-run) feels relaxed.
Check the time and the lift closing times printed on the map. Resorts close the top lifts first, and a long traverse home that was easy at eleven is a dark, icy one at four.
## Grooming, conditions and the daily board
The paper map tells you what the mountain *can* be. The board at the base (and the app) tells you what it *is* today: which lifts are open, which runs are groomed overnight, and which are closed for avalanche control or racing. A blue that was not groomed after a thaw and refreeze is an [ice](/skiing/ice-and-hard-pack) run, whatever colour it is on paper.
Also glance at the aspect. Runs drawn on the left of the map face one way, runs on the right face the other. In the afternoon, sun-facing runs go soft and slushy while the shaded side stays firm - the map tells you which is which if you know roughly where south is.
## Common mistakes
- **Trusting the colour across resorts.** Re-calibrate on the first run of every new resort.
- **Picking a run without checking the lift it ends at.**
- **Taking a dashed-line connector thinking it is a short cut.** It is usually flat and slow; fine for skiers with poles, miserable for the snowboarder you are with.
- **Leaving the last run home too late.** Check lift closing times before lunch.
- **Phone-only.** Take the paper map or a photo of the board.
Watch more here:
https://youtu.be/Y-TIfVG2JGI
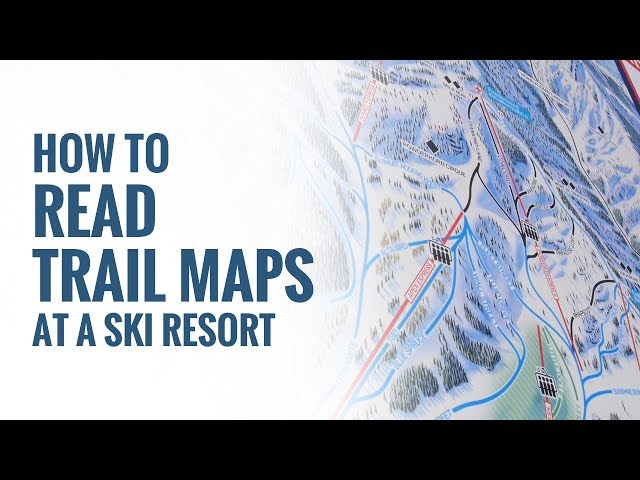
*[Level Nine Sports](https://www.youtube.com/@LevelNineSports) · [How To Read Trail Maps At A Ski Resort](https://www.youtube.com/watch?v=Y-TIfVG2JGI)*
navigate a ski resort using a trail map and understand terrain difficulty
Prerequisites:
picking-skis-and-boots
Introduction, Mountain Etiquette and the Responsibility Code
A trail map is your guide to a ski resort, showing you all the runs, lifts, and facilities. It helps you navigate the mountain and choose terrain that matches your skill level.
A ski trail map (a piste map in Europe) is a drawing of the whole resort: every run, every lift, and the lodges, toilets and ski patrol huts in between. Learning to read one takes ten minutes and saves you from the classic beginner day - riding a lift to the top, finding only black runs down, and side-stepping for an hour.
Look for trail maps at the base lodge, near chairlifts, or grab a paper copy from the ticket office or rental shop. They're usually oriented so 'up' on the map is 'up' the mountain.
You can pick up a paper map at the ticket office, rental shop or base lodge, and most resorts print it on boards at the top and bottom of every lift. Nearly every resort also has it in an app, which adds a blue dot for where you are. Carry the paper one anyway; phones die in the cold.
Every map uses universal symbols for trail difficulty: green circles for easy, blue squares for intermediate, black diamonds for advanced, and double black diamonds for expert terrain.In Europe the colours differ slightly: green or blue for easy, red for intermediate and black for advanced. ## How the map is drawn
You'll also see symbols for lifts, lodges, and other facilities.
Trail maps are paintings, not maps to scale. The artist flattens the mountain so you see it from the valley, with "up" on the page being "up" the hill. Distances are squashed, runs on the far side of a ridge are bent round to fit, and one map often shows several peaks that are really miles apart.
Use the map to plan your route down the mountain, choosing runs that match your comfort level. So use the map for connections, not distances. Pay attention to where lifts take you and how to get back to the base or other areas. The questions it answers well are "which lift gets me to that run", "where does this run end up" and "how do I get back to where I started". It answers "how long will that take" badly.
What the symbols mean
Every run has a colour and shape, and the colour is a rating of that run relative to the rest of this resort, not a universal standard. A blue at a steep resort can be harder than a black at a gentle one.
North America uses shapes as well as colours, so they still work in black and white:
Green circle - easiest. Wide, gentle, groomed.
Blue square - intermediate. Steeper, may have rolls and narrower sections.
Black diamond - advanced. Steep, often ungroomed, moguls or trees.
Double black diamond - expert. Very steep, cliffs, chutes, no fall zones.
Orange oval - terrain park. Jumps, rails and boxes.
A dashed line usually means a cat track or a connecting trail - flat, narrow, and not a run you would choose for fun.
Europe uses colours only, and the scale is shifted:
Green - very easy (not every country uses it; France and Spain do).
Blue - easy. Roughly a North American green or easy blue.
Red - intermediate. Roughly a North American blue or easy black.
Black - advanced. Anything from a steep groomer to a mogul field.
Yellow or dashed - an itinerary route. Marked and avalanche-controlled but not groomed or patrolled. Not a piste.
Off-piste (anything not on a marked run) is unmarked on both continents and is your own responsibility. Read off-piste safety before you go anywhere near it.
Lifts have their own symbols too - a line with a little chair, gondola, or a short tick for a button lift or T-bar. The lift type matters when you are new: button lifts and T-bars are harder to ride than a chairlift, and a gondola means you take your skis off.
Reading the lifts
The lifts are the skeleton of the map. Before you choose a run, trace the lift that takes you to its top and check two things:
What runs leave the top of that lift? If every one of them is black, that lift is not for you yet, no matter how friendly the run you spotted lower down looks.
Where does the bottom of the run put you? Ideally at the base of the same lift (a "pod" you can lap all day) or at the base area. If it ends at a different lift, check what that lift serves.
A green run that ends at a lift which only serves blacks is a trap worth spotting before you get on it.
A trap worth spotting on the map before you get on anything: a green run that ends at a lift which only serves blacks. The map shows it clearly if you look; the mountain does not.
Planning a route down
Pick your run from the top, not from the bottom. Start at the lift you are standing at, find its top on the map, and follow a run down with your finger until it reaches somewhere you recognise. Say the run names (or numbers) out loud - at the junctions on the hill you will see signposts with exactly those names, and matching them is how you stay on route.
For your first days: stick to one pod with a green or blue down and a chairlift back up, and lap it. Exploring across the resort is a day-three activity, once your first blue run feels relaxed.
Check the time and the lift closing times printed on the map. Resorts close the top lifts first, and a long traverse home that was easy at eleven is a dark, icy one at four.
Grooming, conditions and the daily board
The paper map tells you what the mountain can be. The board at the base (and the app) tells you what it is today: which lifts are open, which runs are groomed overnight, and which are closed for avalanche control or racing. A blue that was not groomed after a thaw and refreeze is an ice run, whatever colour it is on paper.
Also glance at the aspect. Runs drawn on the left of the map face one way, runs on the right face the other. In the afternoon, sun-facing runs go soft and slushy while the shaded side stays firm - the map tells you which is which if you know roughly where south is.
Common mistakes
Trusting the colour across resorts. Re-calibrate on the first run of every new resort.
Picking a run without checking the lift it ends at.
Taking a dashed-line connector thinking it is a short cut. It is usually flat and slow; fine for skiers with poles, miserable for the snowboarder you are with.
Leaving the last run home too late. Check lift closing times before lunch.
Phone-only. Take the paper map or a photo of the board.
---
title: Reading the trail map
image: reading-the-mountain.mp4
skill: navigate a ski resort using a trail map and understand terrain difficulty
tags:
- fundamentals
prerequisite:
- introduction
- mountain-etiquette
---
A ski trail map (a piste map in Europe) is a drawing of the whole resort: every run, every lift, and the lodges, toilets and ski patrol huts in between. Learning to read one takes ten minutes and saves you from the classic beginner day - riding a lift to the top, finding only black runs down, and side-stepping for an hour.
You can pick up a paper map at the ticket office, rental shop or base lodge, and most resorts print it on boards at the top and bottom of every lift. Nearly every resort also has it in an app, which adds a blue dot for where you are. Carry the paper one anyway; phones die in the cold.
## How the map is drawn
Trail maps are paintings, not maps to scale. The artist flattens the mountain so you see it from the valley, with "up" on the page being "up" the hill. Distances are squashed, runs on the far side of a ridge are bent round to fit, and one map often shows several peaks that are really miles apart.
So use the map for *connections*, not distances. The questions it answers well are "which lift gets me to that run", "where does this run end up" and "how do I get back to where I started". It answers "how long will that take" badly.
## What the symbols mean
Every run has a colour and shape, and the colour is a rating of that run *relative to the rest of this resort*, not a universal standard. A blue at a steep resort can be harder than a black at a gentle one.
**North America** uses shapes as well as colours, so they still work in black and white:
- **Green circle** - easiest. Wide, gentle, groomed.
- **Blue square** - intermediate. Steeper, may have rolls and narrower sections.
- **Black diamond** - advanced. Steep, often ungroomed, moguls or trees.
- **Double black diamond** - expert. Very steep, cliffs, chutes, no fall zones.
- **Orange oval** - terrain park. Jumps, rails and boxes.
- A **dashed line** usually means a cat track or a connecting trail - flat, narrow, and not a run you would choose for fun.
**Europe** uses colours only, and the scale is shifted:
- **Green** - very easy (not every country uses it; France and Spain do).
- **Blue** - easy. Roughly a North American green or easy blue.
- **Red** - intermediate. Roughly a North American blue or easy black.
- **Black** - advanced. Anything from a steep groomer to a mogul field.
- **Yellow or dashed** - an itinerary route. Marked and avalanche-controlled but not groomed or patrolled. Not a piste.
Off-piste (anything not on a marked run) is unmarked on both continents and is your own responsibility. Read [off-piste safety](/skiing/off-piste-safety) before you go anywhere near it.
Lifts have their own symbols too - a line with a little chair, gondola, or a short tick for a button lift or T-bar. The lift type matters when you are new: [button lifts and T-bars](/skiing/button-lift-and-t-bar) are harder to ride than a chairlift, and a gondola means you take your skis off.
## Reading the lifts
The lifts are the skeleton of the map. Before you choose a run, trace the lift that takes you to its top and check two things:
1. **What runs leave the top of that lift?** If every one of them is black, that lift is not for you yet, no matter how friendly the run you spotted lower down looks.
2. **Where does the bottom of the run put you?** Ideally at the base of the same lift (a "pod" you can lap all day) or at the base area. If it ends at a different lift, check what *that* lift serves.
A trap worth spotting on the map before you get on anything: a green run that ends at a lift which only serves blacks. The map shows it clearly if you look; the mountain does not.
## Planning a route down
Pick your run from the top, not from the bottom. Start at the lift you are standing at, find its top on the map, and follow a run down with your finger until it reaches somewhere you recognise. Say the run names (or numbers) out loud - at the junctions on the hill you will see signposts with exactly those names, and matching them is how you stay on route.
For your first days: stick to one pod with a green or blue down and a chairlift back up, and lap it. Exploring across the resort is a day-three activity, once [your first blue run](/skiing/your-first-blue-run) feels relaxed.
Check the time and the lift closing times printed on the map. Resorts close the top lifts first, and a long traverse home that was easy at eleven is a dark, icy one at four.
## Grooming, conditions and the daily board
The paper map tells you what the mountain *can* be. The board at the base (and the app) tells you what it *is* today: which lifts are open, which runs are groomed overnight, and which are closed for avalanche control or racing. A blue that was not groomed after a thaw and refreeze is an [ice](/skiing/ice-and-hard-pack) run, whatever colour it is on paper.
Also glance at the aspect. Runs drawn on the left of the map face one way, runs on the right face the other. In the afternoon, sun-facing runs go soft and slushy while the shaded side stays firm - the map tells you which is which if you know roughly where south is.
## Common mistakes
- **Trusting the colour across resorts.** Re-calibrate on the first run of every new resort.
- **Picking a run without checking the lift it ends at.**
- **Taking a dashed-line connector thinking it is a short cut.** It is usually flat and slow; fine for skiers with poles, miserable for the snowboarder you are with.
- **Leaving the last run home too late.** Check lift closing times before lunch.
- **Phone-only.** Take the paper map or a photo of the board.
Watch more here:
https://youtu.be/Y-TIfVG2JGI
*[Level Nine Sports](https://www.youtube.com/@LevelNineSports) · [How To Read Trail Maps At A Ski Resort](https://www.youtube.com/watch?v=Y-TIfVG2JGI)*
navigate a ski resort using a trail map and understand terrain difficulty
Prerequisites:
Introduction, Mountain Etiquette and the Responsibility Code
A ski trail map (a piste map in Europe) is a drawing of the whole resort: every run, every lift, and the lodges, toilets and ski patrol huts in between. Learning to read one takes ten minutes and saves you from the classic beginner day - riding a lift to the top, finding only black runs down, and side-stepping for an hour.
You can pick up a paper map at the ticket office, rental shop or base lodge, and most resorts print it on boards at the top and bottom of every lift. Nearly every resort also has it in an app, which adds a blue dot for where you are. Carry the paper one anyway; phones die in the cold.
How the map is drawn
Trail maps are paintings, not maps to scale. The artist flattens the mountain so you see it from the valley, with "up" on the page being "up" the hill. Distances are squashed, runs on the far side of a ridge are bent round to fit, and one map often shows several peaks that are really miles apart.
So use the map for connections, not distances. The questions it answers well are "which lift gets me to that run", "where does this run end up" and "how do I get back to where I started". It answers "how long will that take" badly.
What the symbols mean
Every run has a colour and shape, and the colour is a rating of that run relative to the rest of this resort, not a universal standard. A blue at a steep resort can be harder than a black at a gentle one.
North America uses shapes as well as colours, so they still work in black and white:
Green circle - easiest. Wide, gentle, groomed.
Blue square - intermediate. Steeper, may have rolls and narrower sections.
Black diamond - advanced. Steep, often ungroomed, moguls or trees.
Double black diamond - expert. Very steep, cliffs, chutes, no fall zones.
Orange oval - terrain park. Jumps, rails and boxes.
A dashed line usually means a cat track or a connecting trail - flat, narrow, and not a run you would choose for fun.
Europe uses colours only, and the scale is shifted:
Green - very easy (not every country uses it; France and Spain do).
Blue - easy. Roughly a North American green or easy blue.
Red - intermediate. Roughly a North American blue or easy black.
Black - advanced. Anything from a steep groomer to a mogul field.
Yellow or dashed - an itinerary route. Marked and avalanche-controlled but not groomed or patrolled. Not a piste.
Off-piste (anything not on a marked run) is unmarked on both continents and is your own responsibility. Read off-piste safety before you go anywhere near it.
Lifts have their own symbols too - a line with a little chair, gondola, or a short tick for a button lift or T-bar. The lift type matters when you are new: button lifts and T-bars are harder to ride than a chairlift, and a gondola means you take your skis off.
Reading the lifts
The lifts are the skeleton of the map. Before you choose a run, trace the lift that takes you to its top and check two things:
What runs leave the top of that lift? If every one of them is black, that lift is not for you yet, no matter how friendly the run you spotted lower down looks.
Where does the bottom of the run put you? Ideally at the base of the same lift (a "pod" you can lap all day) or at the base area. If it ends at a different lift, check what that lift serves.
A trap worth spotting on the map before you get on anything: a green run that ends at a lift which only serves blacks. The map shows it clearly if you look; the mountain does not.
Planning a route down
Pick your run from the top, not from the bottom. Start at the lift you are standing at, find its top on the map, and follow a run down with your finger until it reaches somewhere you recognise. Say the run names (or numbers) out loud - at the junctions on the hill you will see signposts with exactly those names, and matching them is how you stay on route.
For your first days: stick to one pod with a green or blue down and a chairlift back up, and lap it. Exploring across the resort is a day-three activity, once your first blue run feels relaxed.
Check the time and the lift closing times printed on the map. Resorts close the top lifts first, and a long traverse home that was easy at eleven is a dark, icy one at four.
Grooming, conditions and the daily board
The paper map tells you what the mountain can be. The board at the base (and the app) tells you what it is today: which lifts are open, which runs are groomed overnight, and which are closed for avalanche control or racing. A blue that was not groomed after a thaw and refreeze is an ice run, whatever colour it is on paper.
Also glance at the aspect. Runs drawn on the left of the map face one way, runs on the right face the other. In the afternoon, sun-facing runs go soft and slushy while the shaded side stays firm - the map tells you which is which if you know roughly where south is.
Common mistakes
Trusting the colour across resorts. Re-calibrate on the first run of every new resort.
Picking a run without checking the lift it ends at.
Taking a dashed-line connector thinking it is a short cut. It is usually flat and slow; fine for skiers with poles, miserable for the snowboarder you are with.
Leaving the last run home too late. Check lift closing times before lunch.
Phone-only. Take the paper map or a photo of the board.
---
title: Reading the trail map
image: reading-the-mountain.jpg
skill: navigate a ski resort using a trail map and understand terrain difficulty
tags:
- fundamentals
prerequisite:
- introduction
- picking-skis-and-boots
- mountain-etiquette
---
A trail map is your guide to a ski resort, showing you all the runs, lifts, and facilities.It helps you navigate the mountain and choose terrain that matches your skill level.
Look for trail maps at the base lodge, near chairlifts, or grab a paper copy from the ticket office or rental shop.They're usually oriented so 'up' on the map is 'up' the mountain.
Every map uses universal symbols for trail difficulty: green circles for easy, blue squares for intermediate, black diamonds for advanced, and double black diamonds for expert terrain.In Europe the colours differ slightly: green or blue for easy, red for intermediate and black for advanced.You'll also see symbols for lifts, lodges, and other facilities.
Use the map to plan your route down the mountain, choosing runs that match your comfort level.Pay attention to where lifts take you and how to get back to the base or other areas.A green run that ends at a lift which only serves blacks is a trap worth spotting before you get on it.
navigate a ski resort using a trail map and understand terrain difficulty
Prerequisites:
Introduction, picking-skis-and-boots, Mountain Etiquette and the Responsibility Code
A trail map is your guide to a ski resort, showing you all the runs, lifts, and facilities.It helps you navigate the mountain and choose terrain that matches your skill level.
Look for trail maps at the base lodge, near chairlifts, or grab a paper copy from the ticket office or rental shop.They're usually oriented so 'up' on the map is 'up' the mountain.
Every map uses universal symbols for trail difficulty: green circles for easy, blue squares for intermediate, black diamonds for advanced, and double black diamonds for expert terrain.In Europe the colours differ slightly: green or blue for easy, red for intermediate and black for advanced.You'll also see symbols for lifts, lodges, and other facilities.
Use the map to plan your route down the mountain, choosing runs that match your comfort level.Pay attention to where lifts take you and how to get back to the base or other areas.A green run that ends at a lift which only serves blacks is a trap worth spotting before you get on it.