Front Lever
- Skill:
- hold 3 sets of a 5 second front lever
- Prerequisites:
- Tuck Front Lever Row, Dragon Flag
The front lever is one of the coolest looking skills in calisthenics, and it doubles as a brutal back and core workout you can do anywhere you can hang.
Three things decide how hard the front lever will be for you. Bodyweight, obviously. Ape factor — long arms relative to your torso mean you need less angle between your arms and body, and if you had infinitely long arms the front lever would be free. And weight distribution — your hands need to be above your center of gravity, so heavy legs push your center of gravity toward your hips and force a steeper arm angle, exactly like having short arms would. A muscle gets weaker the more contracted it is, which is why that steeper angle costs so much. Fun consequence: the front lever is actually easier with someone hanging off your shoulders, because it drags your center of gravity back up toward your chest.
Height matters much less than people think, beyond the indirect fact that taller people are heavier. A longer body is a longer lever for your core — but the core is rarely where people fail. It's almost always the back.
Prerequisites
You're ready to start training the front lever when these feel solid:
- 3×10 tuck front lever rows with your back staying parallel to the floor
- A few full dragon flags, trained with a tight hollow body
- 10+ pull-ups and a strong row
- A 30-second hollow hold
How to do it
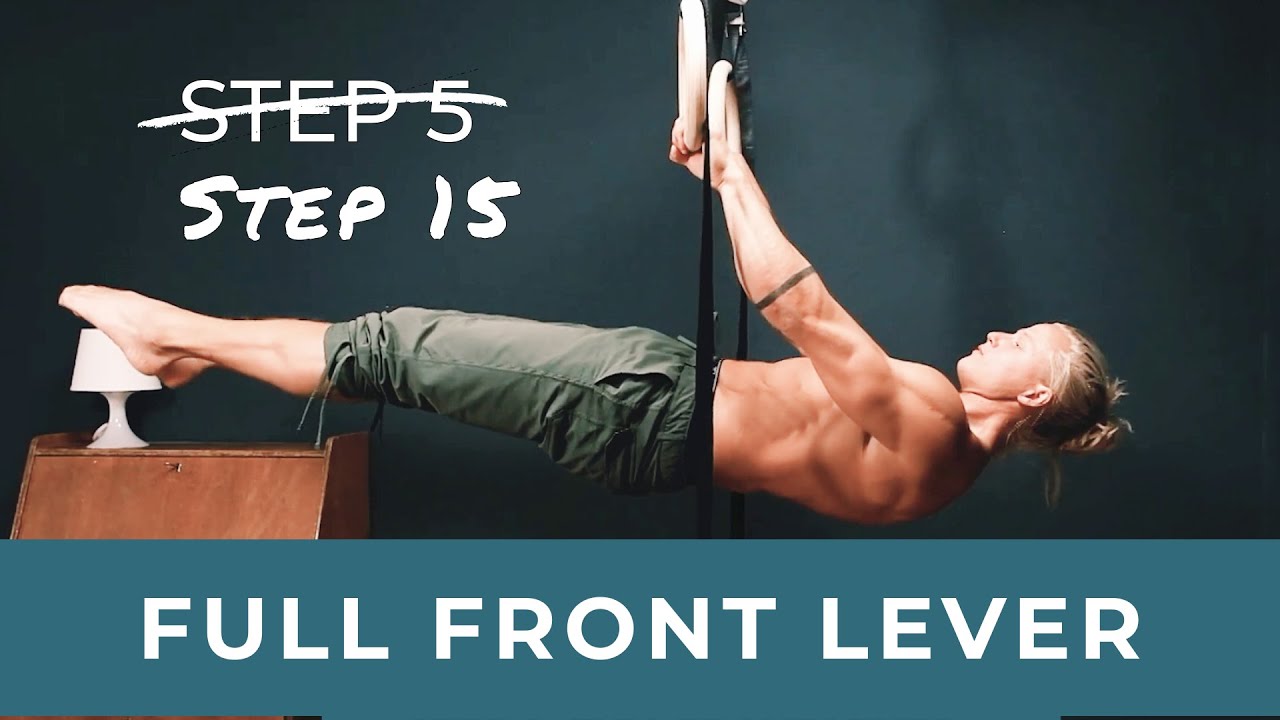
Hang from a bar or rings with an overhand grip, then pull with straight arms until your body comes up horizontal, back parallel to the floor, facing up. From the top down:
- Elbows: locked straight — bending them turns it into a different, easier movement
- Scapula: depressed and retracted; the lats are what hold you up, not the biceps
- Arms: lean back so there's an angle between your arms and your torso — the shorter your arms and the heavier your legs, the steeper that angle needs to be
- Core: hollow body. Never let your lower back arch
Progressions
The standard progression list is tuck → advanced tuck → one leg → straddle → half lay → full, holding each for 30 seconds before moving on. The problem is that those steps are huge. Most people can't jump from one to the next, get frustrated, and stall.
So here's the same ladder with the missing rungs put back in. Almost any progression can be made easier by doing it one leg at a time, or by bending the knees while keeping the hips straight:
- Tuck front lever — knees pulled tight to the chest, the shortest lever
- One leg advanced tuck — one knee stays at the chest, the other hip extends to roughly 90°. Much easier than extending both
- Advanced tuck front lever — both hips at ~90°, knees bent
- One leg half lay — one knee tucked, the other hip fully extended but the knee bent. Great for building endurance before the big jump
- Open half lay front lever — legs straddled wide, both knees bent 90°, both hips fully straight. This one is the most neglected progression on the list and possibly the most important: it's the easiest position in which you can actually straighten both hips, which is exactly the thing everyone struggles with
- One leg front lever — one leg fully straight, one tucked
- Straddle front lever — both legs straight, spread wide
- Half lay front lever — legs together, knees bent
- Full front lever — straight body, legs together, parallel to the floor
Band assistance
Bands are excellent for bridging a gap between progressions — if you use them correctly. Don't wrap the band around your feet. That pulls from an irrelevant direction, changes the position, and changes which muscles do the work.
Instead, set a bar or rings at about hip height, loop the band around your hips, and grab the band together with the bar. Now the assistance pulls straight against gravity and the position stays honest. Avoid very thick bands — they help so much that you stop training. Use the thinnest band that lets you hold the shape.
See more here:
Video by Sondre Berg
Key tips
- Straight elbows, always. A bent-arm front lever is a different skill
- If your hips pike, the step is too big — drop back and use one of the in-between progressions
- The open half lay (straddle legs, bent knees, straight hips) is the cheapest way to learn hip extension. Don't skip it
- Wrap assistance bands around your hips, never your feet, and use the thinnest band that works
- Do dynamic reps top-down: lower from inverted to the hard position and pull back up
- It's the back that fails, not the core, for almost everyone. Train accordingly
- Progress is highly individual. Bodyweight, arm length and weight distribution decide your timeline, not effort alone